Embossing vs. Debossing

Embossing vs. Debossing

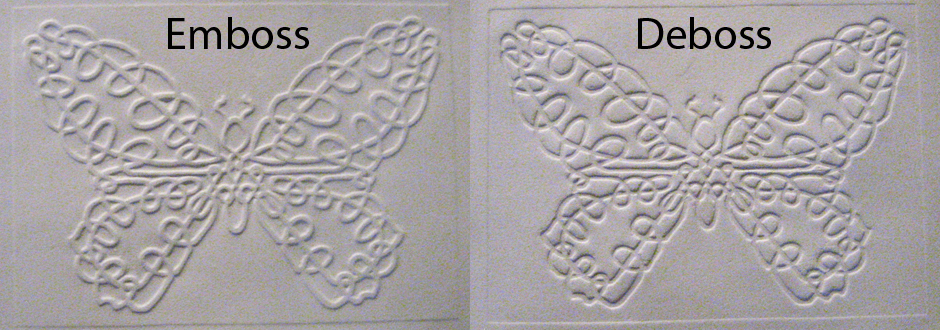
What is the different between embossing and debossing? They are basically the same thing, just stamped paper, but the difference is in the location from where it is stamped. Both are created using metal plates to essentially stamp the paper. Debossing means the paper is stamped on the front, making the image, text or graphic indent and make a depression down, or away from the front. Embossing is taking a metal plate and being stamped from the back back of the text, image or graphic. This raises or elevates the graphics.

Both embossing and debossing a great way to create a 3D effect and enhance certain texts or simple graphics that you want to highlight on your project. To further increase effect, many people add colored ink or foil stamping to certain words and images, as well as various depths of the embossing or debossing. This is a great way to make certain things stand out.

You usually see embossing and debossing on business cards, invitations (especially to weddings and other formal events) and sometimes on letterhead and greeting cards, among other marketing material. These help to add a feel and look of luxury and add a special touch to help you stand out, with very little expense.

Almost anything can be embossed or debossed, along with foil stamped. There are only a few restrictions such as paper type, certain graphics, and time allowed for completion.

Contact us today to learn more about embossing, debossing and foil stamping for your next project.
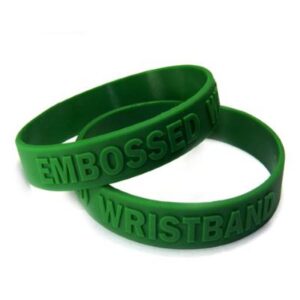
Example of Embossing

Embossed Bracelet

photo courtesy of wristbands.com.uk

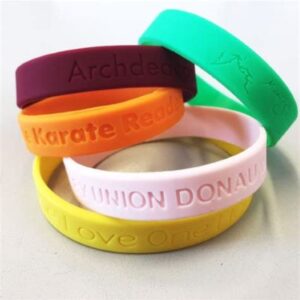
Example of Debossing

Debossed Bracelet

photo courtesy of elito.com

Learn More

Paper Grades and Weights

Paper Grades and Weights

Paper Grades and Weights

Have you ever heard someone refer to the weight of a piece of paper? When getting printing quotes, do you call out what kind of paper you want, or do you leave that up to the printer to determine? There is no right or wrong answer, but see our tips below on typical paper weights, grades and uses.

Paper Grades:

Bond paper – most commonly used for letterhead, business forms and copying. Weights usually range from 20lb for copying or 24lb for stationary.

Text weight paper – most common in printing. This is typically high quality paper with some surface texture. Text paper can be coated or uncoated and weights are typically 60, 70, 80 or 100

Cover weight paper – used with creative business cards, postcards and booklet covers. These again can be uncoated or coated and weights are usually 65, 80 or 100.

Paper Weights:

Paper weights are based on the weight (in pounds) of 500 standard sized sheets of paper. While there are many different terms and names to call out paper, there are some typical names across brands and companies. You can have a text or cover paper grade, with a same weight, that are not the same type of paper. For example, a 60lb text and a 60lb cover are two different types of paper.

Note that just because someone says “65lb” paper, they are not specifying the type of paper. Paper types need to be called out not only by weight, but also type. For example, “60lb text” or “100lb cover” are what you would see. Often times you can get even more fine tuned with saying “80lb cover uncoated”


Check out our articles here and here for more about uncoated vs. coated stock and more fun facts about paper!

How to Save Time During the Print Process

How to Save Time During the Print Process

Looking to speed up the print process? We can help!

While each project takes a different amount of time, depending on the project, there are some things that you can do to help speed up the print process. We go through each project as meticulously as possible to make sure that everything is in order before going to print. We also send a PDF proof with every job, no matter what! That said, there are some things that can help save us (and you!) some time and money on needing to fix files before printing.


  • Convert all images from RGB color to CMYK – don’t know the difference? Check out our article here
  • Make sure the final image(s) has a high enough resolution (must be 300dpi or higher)
  • Make sure you have enough bleed (1/8”) if your printing requires it
  • Make sure all fonts are included
  • If images or graphics are being printed, make sure to send us links, as necessary
  • Make sure the file is in a proper format (Ai, High-Res JPG, PDF, TIF). If the file is too big to send, be sure to ask for our drop box or TFP access folders to drop your files.
  • Does not require any additional modifications before going to press
  • Got questions – just ask! We are happy to help!