
Major Mistakes to Avoid when Proofing Print Projects (Part 1)

Major Mistakes to Avoid when Proofing Print Projects (Part 1)

Part 1 of 2

Success in creating and delivering a compelling marketing campaign or outstanding print project starts before any of the ink hits the page. This is because before printing begins, there is a multi-layered process known as proofing that is meant to ensure everything that a client expects from their project is exactly what they will receive.

During this process, a designer takes a client's design and creates what is known as a proof, or an exact replica or example of the finished product. It is up to the client to carefully inspect this proof to ensure it adheres to their particular specifications. Below are several key tips for avoiding costly mistakes in the print proofing process:

Mistake 1: Proofreading

One of the most important details to look out for and inspect in a proof is also seemingly the most simple: checking a proof for any and all spelling and grammar mistakes. It often goes without saying, but spelling, punctuation, and grammar mistakes in signs, graphics, and printed materials are some of the most common mistakes that can slip under the radar during the proofing process. To ensure that this doesn't happen, it is recommended to slow down, read every word and phrase, and even show another individual the text and content that is to be printed. Spelling and grammar mistakes have the potential to negatively impact a client's credibility in the eyes of the consumer or end-user by portraying them as being without care, organization, or precision.

Mistake 2: Layout and Alignment

There are two layout guidelines that should be considered with every print project: bleeds and cut lines.

Cut lines: This is where the printed piece will be cut after printing. It is important to design all important text, content, and graphics far enough away from the cut lines to ensure that they will not get cut off during the print production process. Similarly, if a printed piece folds, it is highly important to consider where the folds will go so that all content can align to the panel it will be folded within. Panels on the front and the back of a folded piece will need to align as well.

Bleeds: The backgrounds, borders, and fields of color of any printed piece should extend beyond the cut lines to ensure that there is no unintended white space around the edges of a printed piece. For instance, if you would like a design element to appear right at the edge of a piece, it will need to be extended beyond the cut line to ensure a seamless look and consistency amongst print pieces within the same project.


Check back next week for more tips on what to avoid when proofing out your print project! Ready to start your next project? Let us know!

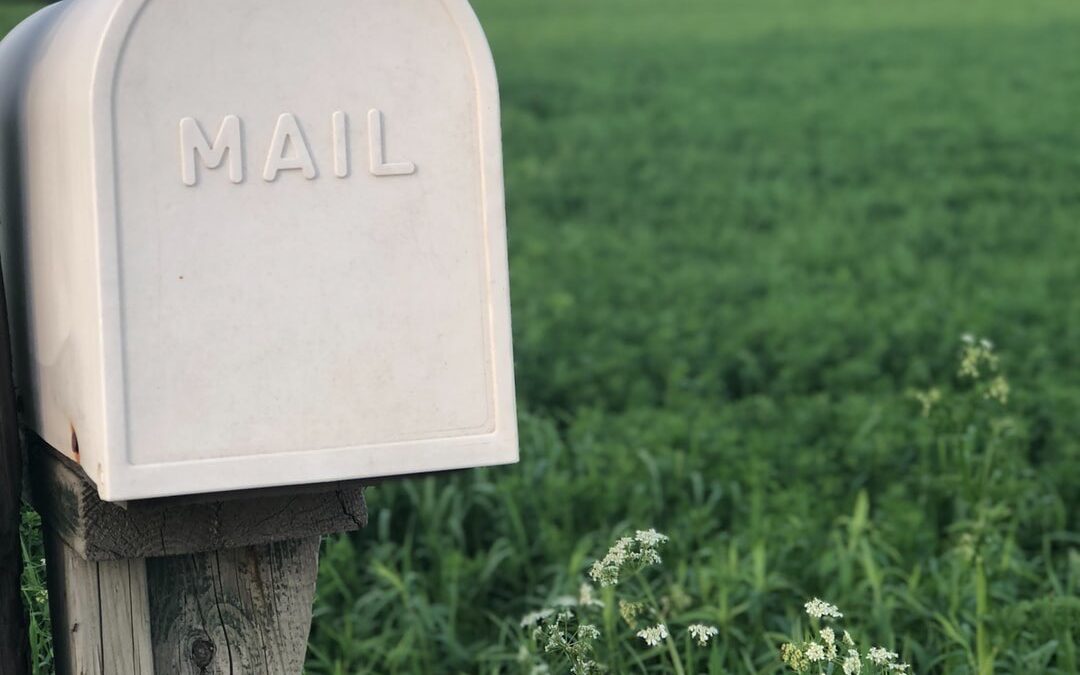
Direct Mail Is Not Dead

Direct Mail Is Not Dead


This morning, I opened my inbox and saw a gem tucked at the bottom of HubSpot’s newsletter:

“What’s the most underrated marketing channel right now?”

Kevin Indig’s answer?

👉 Direct Mail.

"A well-designed print piece can break through the clutter and make an impact."

Cue me practically kissing my computer screen.

Now don’t get me wrong—I love tech. I love my inbox. I live for a good automation tool. But let’s be honest: most emails get skimmed, skipped, or swallowed by the spam folder. We’re all swimming in a sea of subject lines, and it’s easy to drown.

But a great piece of mail?

That’s a different story.

It lands.

When something shows up in your actual mailbox, you notice. There’s a physical moment of interaction—opening, holding, reading—that digital just can’t replicate.

🧠 Fun fact: Direct mail has been shown to trigger activity in parts of the brain responsible for long-term memory and emotional processing. People literally remember it more.

It lingers.

Unlike an email that disappears with one swipe, a printed piece sticks around. It sits on desks. It gets pinned to bulletin boards. It’s visible. Tangible. Memorable.

📬 In fact, 42% of direct mail recipients either read or scan the mail they receive. That’s a lot more than most email open rates.

It gets passed around the office.

People share a great print piece. Whether it’s a beautifully designed postcard, a clever fold-out brochure, or a promotional product that makes them smile—it travels.

👀 Bonus stat: According to the Data & Marketing Association, direct mail response rates are 9x higher than email on average (yes, you read that right).

And sometimes… it ends up on the fridge.

Because hey, good design deserves a spotlight, even in the kitchen.

Why Direct Mail Works (Especially Now)

We live in a digital-first world. But that’s exactly why physical marketing stands out. It’s unexpected. It feels personal. And with the right strategy, it integrates beautifully into an omnichannel campaign—one that touches your audience both online and off.

💡 73% of U.S. consumers say they prefer being contacted by brands via direct mail because they can read it whenever they want. And when combined with digital channels, direct mail can lift response rates by up to 118%.

When Print is Done Right, It’s Not Just Mail—It’s Marketing Magic

That’s the key, isn’t it? Not all mail is created equal. A generic flyer? Easy to ignore. But a smart, well-designed piece with intention behind it? That makes an impact.

At Cascade Print Media, we’ve been helping businesses tap into that magic for decades—turning ideas into high-impact print, promo, and graphic materials that stick (sometimes literally).

So if you’ve been sleeping on direct mail, it might be time to bring it back into your marketing mix. Just sayin’.

Ready to stand out?

Let’s create something that lands, lingers, and earns a spot on the fridge.

👉 Contact us or check out our work here

Bleeds – What To Know About Bleeds In Printing

Bleeds – What To Know About Bleeds In Printing

If you’ve been looking at having goods printed or have dabbled as a graphic designer you’ve likely seen the term “bleed.” But what exactly is bleed and why is it essential for quality prints?

What Does Bleed Mean in Printing?

In printing, “bleed” refers to the area that extends beyond the trim edge of the piece. This extra area helps ensure that no unprinted edges appear on the final piece accommodating for any slight movement of the paper during the trimming operation. Cascade Print Media recommends 1/8th of an inch or 3mm around all sides to every art file.

Benefits of Adding Bleeds

Adding bleeds to your designs offer several advantages:

Prevents White Edges: Even with quality industrial cutting machines the paper can shift slightly during the trimming cuts. Bleeds help ensure the graphic extends beyond the edge which avoids unsightly white edges on printed pieces.

Professional Finish: Bleeds help provide a high-quality look to your printed pieces.

Consistency: It maintains the integrity of the art across multiple prints. Helps ensure that each piece looks identical even if there are slight variations in the trimming process.

How to Create Bleed in Your Design

1: Setup Your Document With Bleeds

When creating a new document set the bleed area ahead of time. Most design tools such as InDesign, Illustrator and Photoshop have options for setting and adding bleeds.

2: Extend the Background

Ensure that any background images, colors or patterns extend into the bleed area at the edges. This ensures those elements will still reach the edge when the paper is trimmed.

3: Keep Important Elements Inside the Safe Zone

While ensuring that the background extends into the bleed area also ensures that all critical elements stay within the safe zone. This is an area usually about ¼” of an inch inside that trim line. This prevents them from being accidentally trimmed off or into. Cascade Print Media also recommends avoiding using thin borders in this area as the natural trim variations will be more noticeable the thinner the border.

4: Use Guides

Most modern design software will allow you to see and add visual guides. Use the guides to accurately position the design elements.

5: Export with Bleed Enabled

When you’re ready to save and export your final file, ensure the bleed settings are included. Most software will include an option to “include bleed” in the export settings. This step is crucial to ensure the printer knows to account for bleeds when trimming down the stock. Bleed from Canva is added via file > view settings > show print bleed. If exporting as a PDF file type ensure “crop marks and bleeds” are selected.

Adding bleeds to your designs is a simple but crucial step to ensure high-quality and professional looking prints. By understanding and applying bleed correctly you can elevate the quality of your pieces and avoid common pitfalls such as white edges or inconsistent borders.

Ready to get started on your next project, but don't know where to start? We can help! Get in touch and we will walk you through the process!

Promotional Products Return on Investment (ROI)

Promotional Products Return on Investment (ROI)

Promotional items

A study by the Advertising Specialty Institute found that “business promotional items are one of the most cost-effective advertising mediums for businesses.” The recall rate for promotional goods is around 89%, meaning that roughly 89% of customers can recall the advertiser on a promotional product they received within the past two years. A further 80% of people can also recall the messaging of the brand if they receive a promotional product from them. A physical item can also be much more effective than other types of campaigns. Promotional mugs and tumblers rank as more effective than radio/TV advertising. Studies report 57% of people can recall a brand’s advertising on a mug vs only 28% against recalling the advertiser on TV.

So why aren’t more businesses leveraging this growth opportunity?

One of the main reasons businesses may not be investing in corporate gifting or custom products is a perceived upfront cost. Certainly, depending on the products chosen, the upfront costs can look higher than expected. It’s important to consider more than just the raw cost when looking for promotional items.

Calculating ROI on promotional items

While not as easy to measure as a digital marketing campaign, this post challenges you to consider the ROI on promotional goods. The ROI is based on impressions – the number of people who are likely to see the branded product. When comparing investing into a marketing plan here’s a way to calculate the return on promo items.

No. of Items x Cost Per Item = Total Spend

Impressions per Product x No. of Items = Total Impressions

Total Spend / Total Impressions = Cost per Impression


Let’s break it down in a simple example using custom coffee mugs:


72 mugs x $10ea = $720

50 impressions ea x 72 = 3,600 views

$720 / 3,600 = $0.20 per impression


So, 72 mugs infrequently used only 50 times a year will get an estimated 3,600 impressions at an average cost of just $0.20 per impression. To put this in perspective the average CPC for Facebook advertising across all industries is roughly $2.00 per click.

With customers who consume coffee every day you could be looking at 72 x 365 or over 26,000 impressions a year. That takes the cost per view down to just $0.02 an impression. Those numbers don’t include others who might see the branding as well, which only drives down the impression costs even further.

Approx number of impressions

Clothing generates the most overall impressions over the expected lifetime of a product. The only exception being polo shirts, which can give the impression of a work uniform, making the wearers seem like employees and not casual users of the product. On average any product is expected to generate multiple hundreds if not thousands of impressions over its lifetime.

Know your target audience

Pick promotional products that your target audience will find useful or enjoy. Narrow in on products that are relevant to your business and will see use. Choosing well focused and quality products helps them stay around.

Approximately 87% of people keep promotional products for longer than a year while 4 out of 10 keep them for more than 5 years. That means people will continue to see your brand over and over, helping give you even more return on investment.


While at first glance promotional product expenses might seem more costly than alternative marketing options the actual cost per impression of promotional goods are extremely cheap. They provide long last lasting and consistent brand reminders to current and potential customers over a long lifespan.

Let Cascade Print Media help you grow your brand by offering solutions and options to stay in your customers’ minds while meeting your budgeting needs.


Sources: PPAI, ASI

Quality Assurance – “Good Enough” is not in our vocabulary

Quality Assurance – “Good Enough” is not in our vocabulary

“Good Enough” is not in our vocabulary.

Ensuring high-quality output isn’t just a step in our workflow—it’s woven into everything we do. Our quality assurance process spans multiple departments, each playing a critical role in delivering consistent, flawless results for our clients.


The Cascade Print Media Quality Assurance Process: Ensuring Excellence in Every Print

At Cascade Print Media, quality isn’t an afterthought—it’s the foundation of everything we do. Whether it’s a high-end brochure, a trade show display, or a simple business card, we take every step necessary to ensure that the final product exceeds expectations. Here’s a behind-the-scenes look at how we maintain precision, consistency, and excellence at every stage of production.


  1. Project Consultation

While it may sound silly, quality starts before the art, job and paper are even ordered.

  • How will the product be used
  • What is the end goal
  • What materials are needed to ensure durability, appearance and brand consistency

Why It Matters: This ensures we order the correct materials that will ensure durability, appearance and brand consistency. Having the right material sets everyone up for success.

  1. Pre-Press: Where Quality Begins

Before ink ever touches paper, we set the stage for success with a meticulous pre-press quality control process.

  • File Verification: We check resolution, bleeds, margins, and color settings to ensure every file is production-ready
  • Proofing: Digital and physical proofs allow clients to review and approve designs before production
  • Material Verification: We confirm the best materials for durability, appearance, and brand consistency
  • Preflight Inspection: We catch common issues—like missing fonts or low-res images—before they become costly mistakes
  • Color Accuracy: Whether matching Pantone colors or ensuring brand consistency, we fine-tune colors to be spot-on.

Why It Matters: A single overlooked error in pre-press can lead to reprints, delays, and unnecessary costs. We take the time to get it right before printing begins.

  1. Production: Precision in Every Print

Once we move to production, our teams monitor every detail to maintain consistency and clarity.

  • Print & Color Matching: We continuously check colors against brand guidelines to ensure every piece is accurate
  • Sample Inspections: We pull samples during production to verify sharpness, ink coverage, and alignment and print quality
  • Real-Time Adjustments: Operators fine-tune ink levels, registration and settings to maintain a flawless finish
  • Uniformity Checks: We inspect for color shifts or imperfections across large print runs
  • Quality Checks for Apparel & Promo: From checking stitching to ensuring imprint placement, we inspect each item closely
  • Third Party Inspection: We have a third set of eyes, not involved in the project, inspect each job before giving it the final approval to move to finishing

Why It Matters: Quality isn’t just about the first item—it’s about ensuring every single piece in the order meets the highest standards.

  1. Finishing & Bindery: Details Make the Difference

After production, our finishing team ensures that every project is assembled, finished and packed with precision.

  • Trim & Die-Cut Precision: Clean cuts, sharp edges, and exact measurements are a must
  • Binding & Folding Checks: Whether it’s a booklet, brochure, or apparel tag, we ensure alignment is perfect
  • Lamination & Coating: We apply finishes that enhance durability and appearance—free from bubbles or imperfections
  • Apparel and Product Inspection: We check for thread consistency, proper placement, and flawless application
  • Spot-Check Sampling: Before packaging, we inspect samples to confirm final quality

Why It Matters: The final presentation of a product is just as important as the product itself. Even the slightest misalignment can impact a brand’s reputation.

  1. Packaging & Shipping: Delivering Perfection

The last step in our process ensures that your materials arrive in pristine condition.

  • Final Inspection: We verify quantities, quality, and specifications before packaging
  • Protective Packaging: From shrink-wrapping to reinforced boxes, we package with care
  • Label Accuracy: Every order is checked for correct addresses and special shipping requests
  • Reliable Delivery: We work with trusted carriers to ensure on-time, damage-free delivery

Why It Matters: A flawless order is useless if it arrives damaged. Our final checks guarantee your materials look just as good when they arrive as when they left our shop.


Why Our Quality Control Process Sets Us Apart

Quality isn’t just a department—it’s a mindset across every stage of production. Whether it’s a business card or a large-scale wall graphic, we follow the same rigorous process to ensure your brand looks its best, every time. From pre-press to packaging, every team member plays a role in ensuring the final product is something we’d be proud to put our name on.


Looking for a print partner that takes quality seriously? Let’s chat! Whether it’s business cards or large-format signage, we’re here to ensure every product makes an impact.

📢 Want to see our QA process in action? Schedule a tour—we love showing off what we do!